Boat Lift Motor Replacement and Wired Pendant Controllers: A Real-World Wiring Guide
Your boat lift motor is the single hardest-working piece of equipment on your dock. It’s a small electric motor — typically between ½ and 2 horsepower — that turns a drum or cable system to raise and lower your boat out of the water. Most shore station lifts (the kind with four posts and a cradle that you crank your boat onto) use a standard capacitor-start AC motor wired directly to a drum switch — basically a weatherproof rotary switch mounted on a post that you flip to go Up, Off, or Down. When that motor burns out or when you want to add a pendant controller (a handheld wired remote that lets you raise or lower the lift without walking to the switch box), the project looks more intimidating than it is. This guide breaks down the decision points: which motor specs actually matter, why wiring diagrams so often cause headaches, which switch and controller options are worth the upgrade, and where real-world owners have run into trouble — so you can avoid the same mistakes.
| EDITOR'S PICK[Extreme Max 3006.4553 Boat Lift](https://www.amazon.com/dp/B00IG3B55W?tag=greenflower20-20)… | Mid-tierBoat Lift RF Remote Control Sys… | Budget pickExtreme Max 3005.7284 15' Corde… | |
|---|---|---|---|
| Voltage | 120V | 120V | — |
| Controller type | Wheel drive | RF remote | Pendant |
| Phase | — | Single | — |
| Limit switches | — | ✓ | — |
| Cord length | — | — | 15' |
| Price | $875.00 | $249.95 | |
| See on Amazon → | See on Amazon → | See on Amazon → |
Motor Specs That Actually Matter (and One That Doesn’t)
If you’re replacing a failed motor, there are four numbers you need before you order anything:
- Horsepower — typically ½ HP, ¾ HP, or 1 HP for residential shore station lifts
- Voltage — almost always 120V single-phase for residential docks; some commercial setups run 240V
- Frame size — the NEMA frame number (48, 56, or 56C are most common) tells you the bolt pattern and shaft diameter; a replacement must match
- Rotation direction — most drum-style lifts need a reversible motor because the drum switch handles direction; confirm yours is reversible before buying
What doesn’t matter as much as it looks? The exterior finish. This is worth dwelling on, because it’s where the most painful real-world failure pattern shows up.
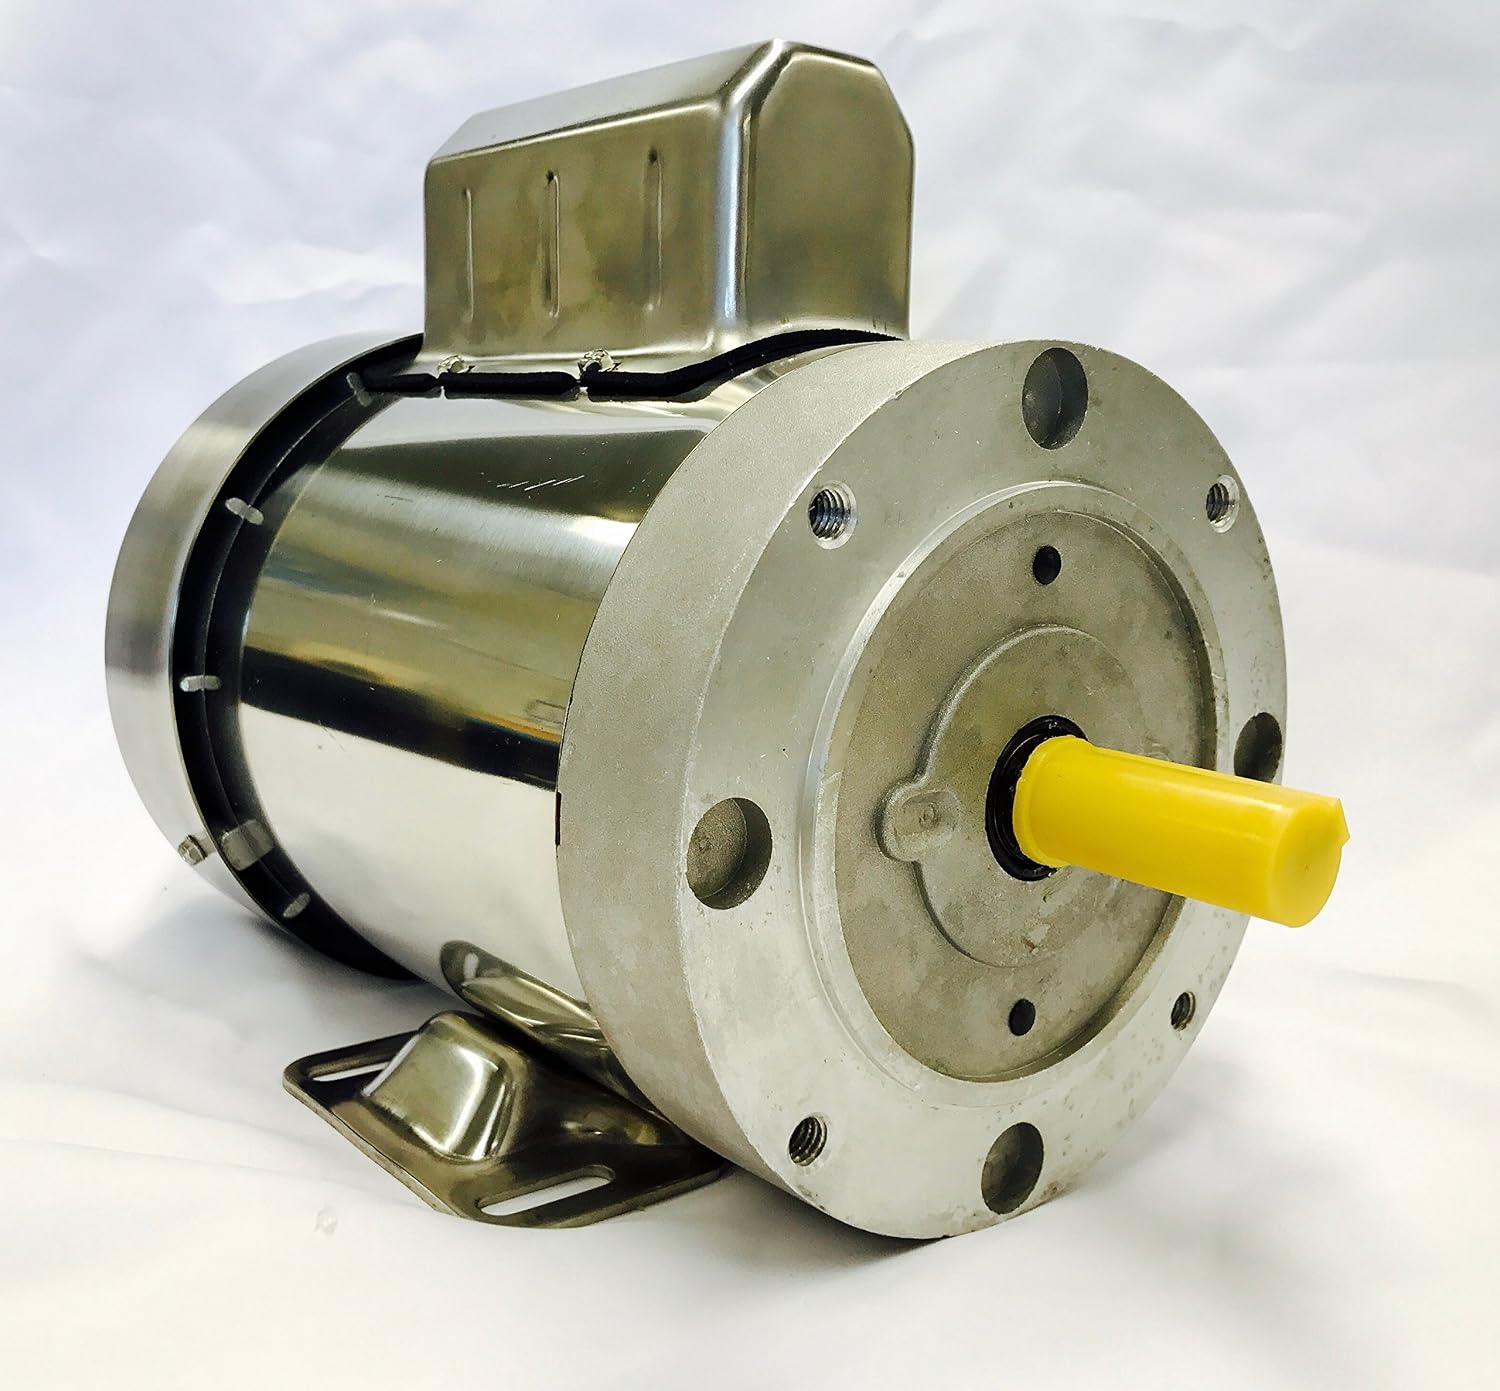
The stainless exterior problem. Several owners who upgraded to motors marketed with stainless steel housings for corrosion resistance have reported failures inside of a year — specifically, the internal centrifugal switch (a mechanical component that disconnects the start winding once the motor reaches operating speed) rusting and seizing. Practical Sailor’s overview of marine electrical corrosion mechanisms notes that salt-air and humidity infiltrate motor housings through shaft seals and ventilation slots regardless of what the shell is made of. A stainless outer shell signals nothing about what the start capacitor, centrifugal switch, or winding insulation are made of. When evaluating any motor marketed for dock use, look for spec sheets that describe internal component treatment — coated windings, sealed bearings, treated internal hardware — not just the housing material.
Will 1 HP handle a 5,500-lb deck boat? On a standard four-post shore station with a properly tensioned cable system, manufacturer ratings from lift brands suggest 1 HP motors are typically rated for boat weights in the 3,500–5,500 lb range depending on cable geometry and drum size. A 5,500-lb loaded deck boat sits right at the edge of that range. If your current motor is ¾ HP and you’re noticing thermal cutouts tripping on the raise cycle, the answer is almost certainly to step up to 1 HP. If you’re already at 1 HP and still struggling, the problem is usually mechanical — worn sheaves, a frayed cable with increased friction, or a drum that needs re-spooling — not electrical.
Drum Switches, Pendant Controllers, and RF Options: The Decision Frame
By the numbers:
- Standard drum switch replacement: typically under $80, direct swap, no wiring changes
- Wired pendant controller: adds ~$50–$120 to the project, requires running a low-voltage or line-voltage cable to the dock edge
- RF (radio frequency) wireless controller: typically $150–$250, eliminates the cable run but adds programming complexity and a receiver box
- AMS spring-return switch: sits between a basic drum switch and a full pendant — a single-gang weatherproof switch with spring-return-to-off action, typically under $100
If your only goal is daily convenience — not fumbling with a switch box while holding a dock line — the corded wired pendant is the clearest win. Owner feedback on wired pendant controllers is almost uniformly positive and focused on one thing: not having to walk to the switch housing every time you dock. The pendant lives on the dock edge or in your hand, and the lift responds immediately. It’s not glamorous. It works.
If your dock already has non-standard wiring, budget time for troubleshooting. This is the main friction point that shows up in reviews of RF controllers like the GAMA RF unit, and it’s worth understanding before you’re mid-install. Dock wiring installed by the previous owner — especially on older properties — frequently doesn’t follow the color coding on controller diagrams. One reviewer documented needing a custom wiring diagram from manufacturer support because their existing motor leads were labeled in a non-standard way that matched nothing in the included instructions. Per This Old House’s guide to reading wiring diagrams, the rule is: before you disconnect anything, photograph every terminal, note the wire color at each one, and note any labeling on the motor’s own terminal block. Write it down on paper. That documentation is your insurance.
The AMS spring-return switch occupies a practical middle ground. Instead of a three-position rotary drum switch (Up/Off/Down), it uses a momentary spring-return action — you hold it to raise or lower, and it stops the moment you release. Reviewers consistently appreciate the safety-logic of that: no more accidentally leaving the lift running because you bumped the drum switch. The consistent real-world note from owners is to check your motor wiring compatibility before buying one, because the terminal arrangement can differ, and the enclosure box that houses the switch is compact — there isn’t much room to work once you’re inside.
Wiring a Pendant Controller: What to Do Before You Touch a Terminal
Motor replacement and controller upgrades are within reach of anyone comfortable with basic residential electrical work. But there are four things you should do before touching a single wire:
1. Cut power at the breaker and verify it’s off. Dock panel circuits are typically 15A or 20A at 120V. Use a non-contact voltage tester on the motor’s supply terminals before proceeding. Power & Motoryacht’s guide to dock power setups notes that older dock wiring occasionally has multiple circuits feeding a single area — test at the actual motor terminals, not just at the switch.
2. Photograph every connection. Both the motor terminal block and the existing switch/controller. Write down what connects where using your own labels (L1, L2, T1, T2, or whatever the motor’s terminal block uses). This matters most when the wiring diagram on your new controller doesn’t match your existing motor leads — which is common enough that you should expect it rather than be surprised by it.
3. Note the motor’s nameplate data. Photo or transcribe: HP, voltage, full-load amps (FLA), frame size, rotation, and capacitor rating if listed. If the centrifugal switch or run capacitor has failed rather than the motor itself, that nameplate data is what you need to source replacement components.
4. Check your conduit fill. If you’re adding a pendant cable run, verify that your existing dock conduit has room for an additional conductor. Adding a wired pendant to an already-full conduit run means either pulling new conduit or choosing the RF controller option instead.
The Boat Lift Buddy Wheel Drive: A Different Approach
For lifts that use a wheel-drive system rather than a motor-and-drum setup, the Boat Lift Buddy takes a completely different approach — a variable-speed battery-powered drill drives a rubber wheel against the lift’s existing cable or shaft. Owner feedback is generally positive, and it’s a popular upgrade for lifts where rewiring a hardwired motor isn’t practical. The one durability question that comes up consistently: rubber drive wheel wear. At least one owner in aggregated reviews has adopted the practice of using the wheel drive only on the raise cycle, then lowering manually or under gravity with light motor assist, specifically to slow rubber wear. How long a drive wheel lasts will depend heavily on how often you use the lift and whether the wheel is properly tensioned against the drive surface — but if you’re using this system daily, plan on inspecting the wheel surface seasonally and treating replacement wheels as a consumable.
Frequently Asked Questions
Does a stainless steel motor housing mean the internal components are also corrosion-resistant? No — and this is the most important thing to understand before you buy. Stainless housing protects against surface rust on the shell. Internal components — the centrifugal switch, capacitor, start windings, and shaft bearings — are exposed to humidity and salt air through ventilation slots and shaft seals regardless. Real-world reviews document centrifugal switch rust failure in under a year on motors with stainless exteriors. Evaluate the internal treatment specs, not the shell material.
What should I note before disconnecting my old boat lift motor? Photograph every terminal on the motor block and every terminal on the existing switch or controller. Write down wire color and terminal label for each. Check the motor nameplate for HP, voltage, frame size, FLA, and capacitor specs. This documentation is your recovery path if the new controller’s wiring diagram doesn’t match your existing leads.
Can I replace a drum switch with an RF controller myself, or do I need an electrician? If you’re comfortable with basic residential electrical work and you follow lockout/tagout discipline (breaker off, verified dead with a tester), it’s a DIY-capable project for most people. The main difficulty is non-standard existing wiring that doesn’t match the new controller’s diagram. If your dock wiring is original and has never been modified, you’ll likely be fine with the included instructions. If it’s been modified or is older than 15–20 years, budget time for troubleshooting or get an electrician’s input on the existing wiring before proceeding.
How long does the rubber drive wheel last on a Boat Lift Buddy system? There’s no published wear-life spec from the manufacturer. Based on owner feedback patterns, daily use creates meaningful wear over a season; one owner specifically limits drive wheel use to raise-only cycles to extend life. Inspect the wheel surface for flat spots or cracking at the start of each season, and treat replacement wheels as a normal maintenance item.
Will a 1 HP motor handle a 5,500-lb deck boat on a standard shore station lift? It sits at the upper edge of typical 1 HP motor ratings for shore station applications. Most manufacturer documentation for residential shore station lifts puts 1 HP capacity in the 3,500–5,500 lb range depending on cable geometry. If you’re at or above that weight, confirm the motor’s specific lift-weight rating and check the mechanical condition of your cable and sheaves before concluding the motor is undersized.
What do I do if the wiring diagram on the controller doesn’t match my existing motor leads? First, don’t guess. Contact the controller manufacturer’s support line with photos of your motor nameplate and existing terminal connections — several manufacturers, including the GAMA RF controller support team based on documented reviewer experience, will provide a custom wiring diagram for your specific motor. Boatingmag.com’s electrical troubleshooting coverage consistently emphasizes that motor lead labeling varies by manufacturer and era, and a wrong connection can damage the start capacitor or cause reverse rotation.
The decision frame, in plain terms: If you want the simplest, most reliable upgrade for daily use, a wired pendant controller is the right call — low complexity, lowest wiring risk, owners love it. If you want wireless freedom and you have clean, standard dock wiring, an RF controller is a reasonable project. If your motor is also failing, prioritize internal corrosion protection specs over exterior finish marketing. And if you’re doing any of this yourself, your pre-work documentation — photos, notes, nameplate data — is worth more than any single component you buy.